Adding a Novell NetWare (NCP) Printer
To add a Novell NetWare (NCP) printer, click the New button in the main Printer Configuration Tool window. The window shown in Figure 26-1 will appear. Click Next to proceed.
You will see the screen shown in Figure 26-9. Enter a unique name for the printer in the Queue Name text field. The printer name cannot contain spaces and must begin with a letter a through z or A through Z. The valid characters are a through z, A through Z, 0 through 9, -, and _.
Select Novell Printer from the Queue Type menu, and click Next.

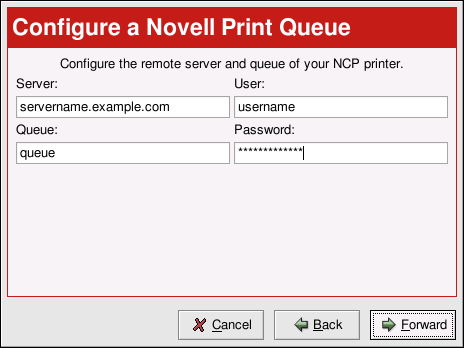
Text fields for the following options appear below the Queue Type menu as shown in Figure 26-10:
Server — The hostname or IP address of the NCP system to which the printer is attached.
Queue — The remote queue for the printer on the NCP system.
User — The name of the user you must log in as to access the printer.
Password — The password for the user specified in the User field above.
The next step is to select the type of printer that is connected to the remote NCP system. Skip to the Section called Selecting the Print Driver and Finishing to continue.
 | Note |
|---|---|
If you require a username and password for a NCP (NetWare) print queue, they are stored Thus, it is possible for another person to learn the username and password. To avoid this, the username and password to use the printer should be different from the username and password used for the user's account on the local Red Hat Linux system. If they are different, then the only possible security compromise would be unauthorized use of the printer. |