Chapter 26. Printer Configuration
Printer Configuration Tool allows users to configure a printer in Red Hat Linux. It helps maintain the /etc/printcap configuration file, print spool directories, and print filters.
Starting with version 8.0, Red Hat Linux ships with two printer systems. Printer Configuration Tool configures the printing system called LPRng. LPRng is also the default printing system. This chapter focuses on using Printer Configuration Tool to configure LPRng. For more information on the alternate printing system called CUPS, refer to the Section called Configuring the CUPS Printing System.
To use Printer Configuration Tool, you must have root privileges. To start the application, select Main Menu Button (on the Panel) => System Settings => Printing, or type the command redhat-config-printer. This command automatically determines whether to run the graphical or text-based version.
You can also force Printer Configuration Tool to run as a text-based application by using the command redhat-config-printer-tui from a shell prompt.
To add a printer using the command line version, refer to the Section called Command Line Configuration.
 | Important |
|---|---|
Do not edit the /etc/printcap file. Each time the printer daemon (lpd) is started or restarted, a new /etc/printcap file is dynamically created. |
If you want to add a printer without using Printer Configuration Tool, edit the /etc/printcap.local file. The entries in /etc/printcap.local are not displayed in the Printer Configuration Tool but are read by the printer daemon. If you upgrade your system from a previous version of Red Hat Linux, your existing configuration file is converted to the new format used by this application. Each time a new configuration file is generated, the old file is saved as /etc/printcap.old.
Five types of print queues can be configured:
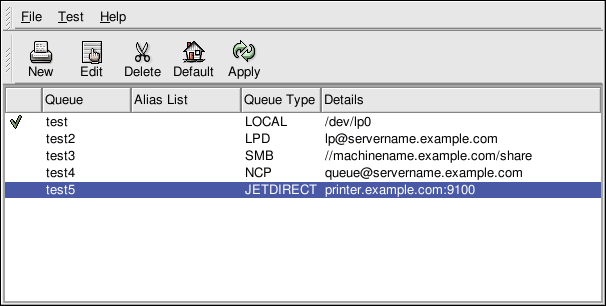
Local Printer — a printer attached directly to your computer through a parallel or USB port. In the main printer list as shown in Figure 26-1, the Queue Type for a local printer is set to LOCAL.
Unix Printer (lpd Spool) — a printer attached to a different UNIX system that can be accessed over a TCP/IP network (for example, a printer attached to another Red Hat Linux system on your network). In the main printer list as shown in Figure 26-1, the Queue Type for a remote UNIX printer is set to LPD.
Windows Printer (SMB) — a printer attached to a different system which is sharing a printer over a SMB network (for example, a printer attached to a Microsoft Windows machine). In the main printer list as shown in Figure 26-1, the Queue Type for a remote Windows printer is set to SMB.
Novell Printer (NCP Queue) — a printer attached to a different system which uses Novell's NetWare network technology. In the main printer list as shown in Figure 26-1, the Queue Type for a remote Novell printer is set to NCP.
JetDirect Printer — a printer connected directly to the network through HP JetDirect instead of to a computer. In the main printer list as shown in Figure 26-1, the Queue Type for a JetDirect printer is set to JETDIRECT.
| Important |
|---|---|
If you add a new print queue or modify an existing one, you need to restart the printer daemon (lpd) for the changes to take effect. |
Clicking the Apply button saves any changes that you have made and restarts the printer daemon. The changes are not written to the /etc/printcap configuration file until the printer daemon (lpd) is restarted. Alternatively, you can choose File => Save Changes and then choose File => Restart lpd to save your changes and then restart the printer daemon.
If a printer appears in the main printer list with the Queue Type set to INVALID, the printer configuration is missing options that are required for the printer to function properly. To remove this printer from the list, select it from the list and click the Delete button.
Adding a Local Printer
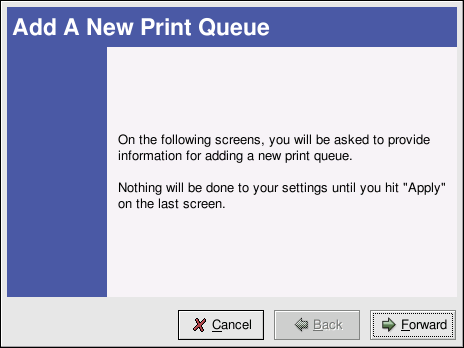
To add a local printer such as one attached to the parallel port or USB port of your computer, click the New button in the main Printer Configuration Tool window. The window shown in Figure 26-2 will appear. Click Next to proceed.
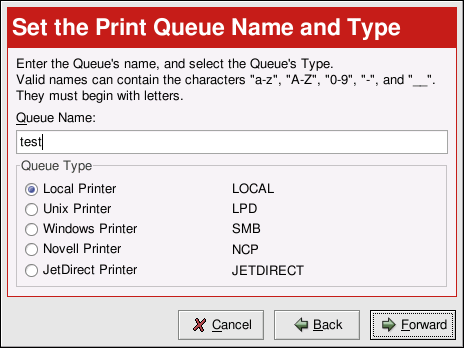
You will then see the screen shown in Figure 26-3. Enter a unique name for the printer in the Queue Name text field. This can be any descriptive name for your printer. The printer name cannot contain spaces and must begin with a letter a through z or A through Z. The valid characters are a through z, A through Z, 0 through 9, -, and _.
Select Local Printer from the Queue Type menu, and click Next.
Printer Configuration Tool attempts to detect your printer device and model as shown in Figure 26-4. If your printer device is not shown, click Custom Device. Type the name of your printer device and click OK to add it to the printer device list. A printer device attached to the parallel port is usually referred to as /dev/lp0. A printer device attached to the USB port is usually referred to as /dev/usblp0. If your printer model does not appear, you will be given the opportunity to select it in the next step. Click Next to continue.
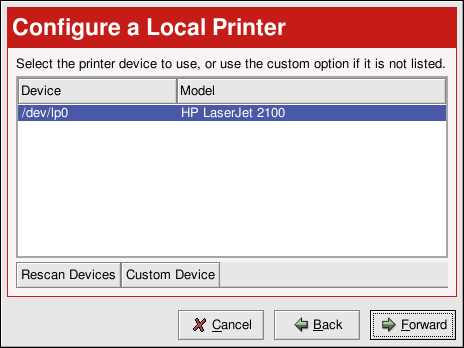
If Printer Configuration Tool detected your printer model, it will display the recommended print driver. Skip to the Section called Selecting the Print Driver and Finishing to continue.